
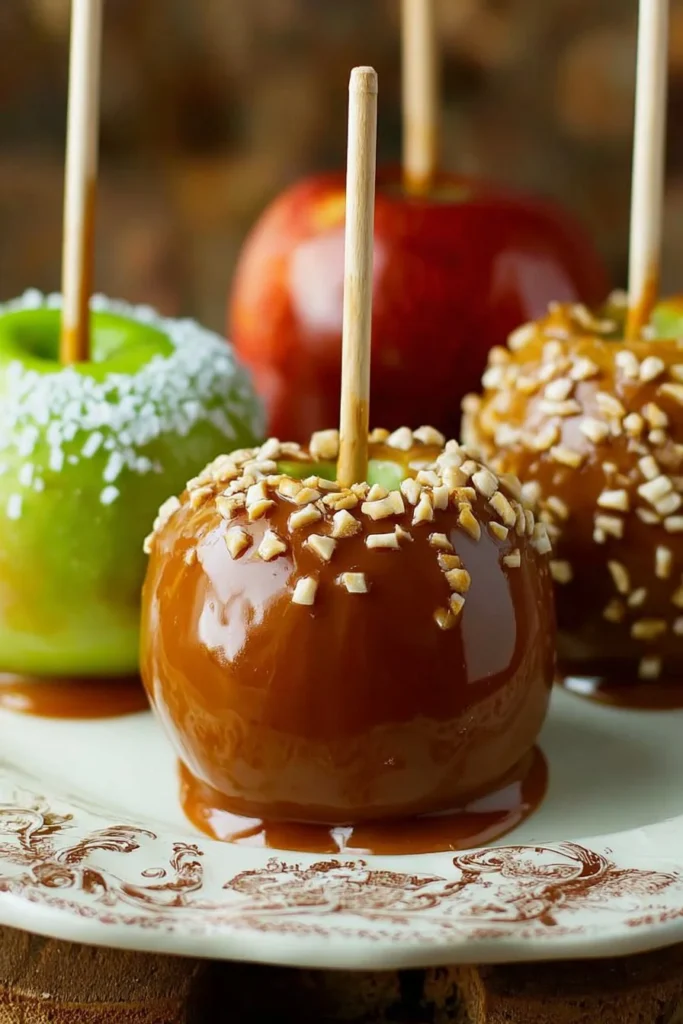
Homemade caramel apples are a delightful treat that combines the crispness of fresh apples with the sweetness of rich caramel. Perfect for fall festivals, Halloween treats, or just a fun day in the kitchen, these decadent desserts are loved by both kids and adults alike. Making caramel apples at home allows you to customize flavors and toppings to create a deliciously unique experience.
Why Make This Recipe
There are many reasons to make homemade caramel apples. First, they are incredibly easy to create with just a few ingredients. Second, you can personalize them with your favorite toppings, such as nuts, chocolate, or sprinkles. Lastly, the process of making caramel from scratch is fun and satisfying, giving you a delicious reward at the end.
How to Make Homemade Caramel Apples
Making homemade caramel apples is a fun project that’s worth the effort. Follow these simple steps to create your own delicious treats!
Ingredients:
- 8 small apples (chilled)
- Caramel apple sticks (lollipop sticks or popsicle sticks work as well)
- 1 cup water
- 1 1/2 cup granulated sugar
- 2 Tablespoons light corn syrup
- 1 teaspoon salt
- 2 cups heavy cream (chilled)
- 1 teaspoon vanilla extract
Directions:
- Wash the apples in warm water and dry each one thoroughly. This step helps remove the waxy coating so the caramel sticks better.
- Insert the caramel apple sticks into the top of each apple where the stem is located. Use a folded dish towel to push the stick down the center of the apple as straight as possible. Place the prepared apples in the fridge.
- In a medium-sized, heavy-bottomed saucepan with tall sides, add the water, sugar, corn syrup, and salt. Turn the heat to medium-high and stir constantly with a wooden spoon until the sugar completely dissolves.
- Once the mixture starts boiling, stop stirring and watch closely until the caramel turns an amber color. This may take about 10 minutes. If one area darkens faster, gently swirl the whole pot without stirring, as stirring may cause the caramel to crystalize.
- When the caramel reaches a medium amber color, reduce the heat to medium-low and carefully stir in the heavy cream. Expect the mixture to bubble up significantly. Keep stirring until it reaches 246°F, then remove it from the heat and mix in the vanilla.
- Dip each apple into the hot caramel, swirling to coat evenly. Allow excess caramel to drip off before placing the dipped apple on a piece of parchment or a silicone baking mat sprayed with cooking spray. Let the apples cool completely for about 30 minutes.
- After the apples have cooled down, you can dip them in chocolate and add any toppings you like.
How to Serve Homemade Caramel Apples
Homemade caramel apples are best served fresh. They can be enjoyed as is or dressed up with chocolate and toppings. Cut them into wedges for easy sharing or display them on a platter for a festive look.
How to Store Homemade Caramel Apples
Store leftover caramel apples in the refrigerator. Keep them in an airtight container to prevent them from getting sticky. It’s best to enjoy them within a few days for the freshest taste.
Tips to Make Homemade Caramel Apples
- Make sure to wash and dry the apples properly for the caramel to stick.
- Use a heavy-bottomed saucepan to help control the heat while making caramel.
- If the caramel hardens while working, gently reheat it on low until it’s more manageable.
- Experiment with different toppings, such as crushed nuts, coconut flakes, or candy pieces for variety.
Variation
You can try different flavors of caramel by adding ingredients like cinnamon, sea salt, or even pumpkin spice for a seasonal twist.
FAQs
1. Can I use any type of apple for caramel apples?
Yes, but firmer apples like Granny Smith, Fuji, or Honeycrisp work best as they provide a nice contrast to the sweetness of caramel.
2. Is it necessary to chill the apples before making caramel apples?
Yes, chilling the apples helps the caramel stick better and reduces the risk of the caramel melting off later.
3. How long do homemade caramel apples last?
They can last in the fridge for about 3 to 5 days, but they’re best enjoyed fresh.
Enjoy making and indulging in your homemade caramel apples!
Homemade Caramel Apples
Ingredients
For the Caramel Apples
- 8 small small apples (chilled) Firmer apples like Granny Smith, Fuji, or Honeycrisp work best.
- Caramel apple sticks (lollipop sticks or popsicle sticks work as well) Sticks help dip the apples into caramel.
- 1 cup water
- 1.5 cups granulated sugar
- 2 Tablespoons light corn syrup
- 1 teaspoon salt
- 2 cups heavy cream (chilled)
- 1 teaspoon vanilla extract
Instructions
Preparation
- Wash the apples in warm water and dry each one thoroughly to remove waxy coating.
- Insert the caramel apple sticks into the top of each apple where the stem is located.
- Place the prepared apples in the fridge.
Making the Caramel
- In a medium-sized, heavy-bottomed saucepan, add the water, sugar, corn syrup, and salt.
- Turn the heat to medium-high and stir constantly until the sugar dissolves.
- Once boiling, stop stirring and watch closely until the caramel turns an amber color (about 10 minutes).
- When it reaches a medium amber color, reduce heat to medium-low and carefully stir in the heavy cream.
- Keep stirring until it reaches 246°F, then remove from heat and mix in vanilla.
Dipping the Apples
- Dip each apple into the hot caramel, allowing excess to drip off.
- Place the dipped apple on parchment or a silicone baking mat and let cool completely (about 30 minutes).
Serving and Storing
- Serve fresh, optionally dipped in chocolate and topped with various toppings.
- Store leftovers in airtight container in the refrigerator, best eaten within a few days.